Rubrik Security Cloud operationalizes all the data situated in your distributed environment into a robust metadata framework. It organizes all the business information to make it discoverable and usable, no matter where it is. By consolidating all the metadata from several data sources into a unified system of record, Rubrik enables customers to exploit the business value hidden in their data assets.
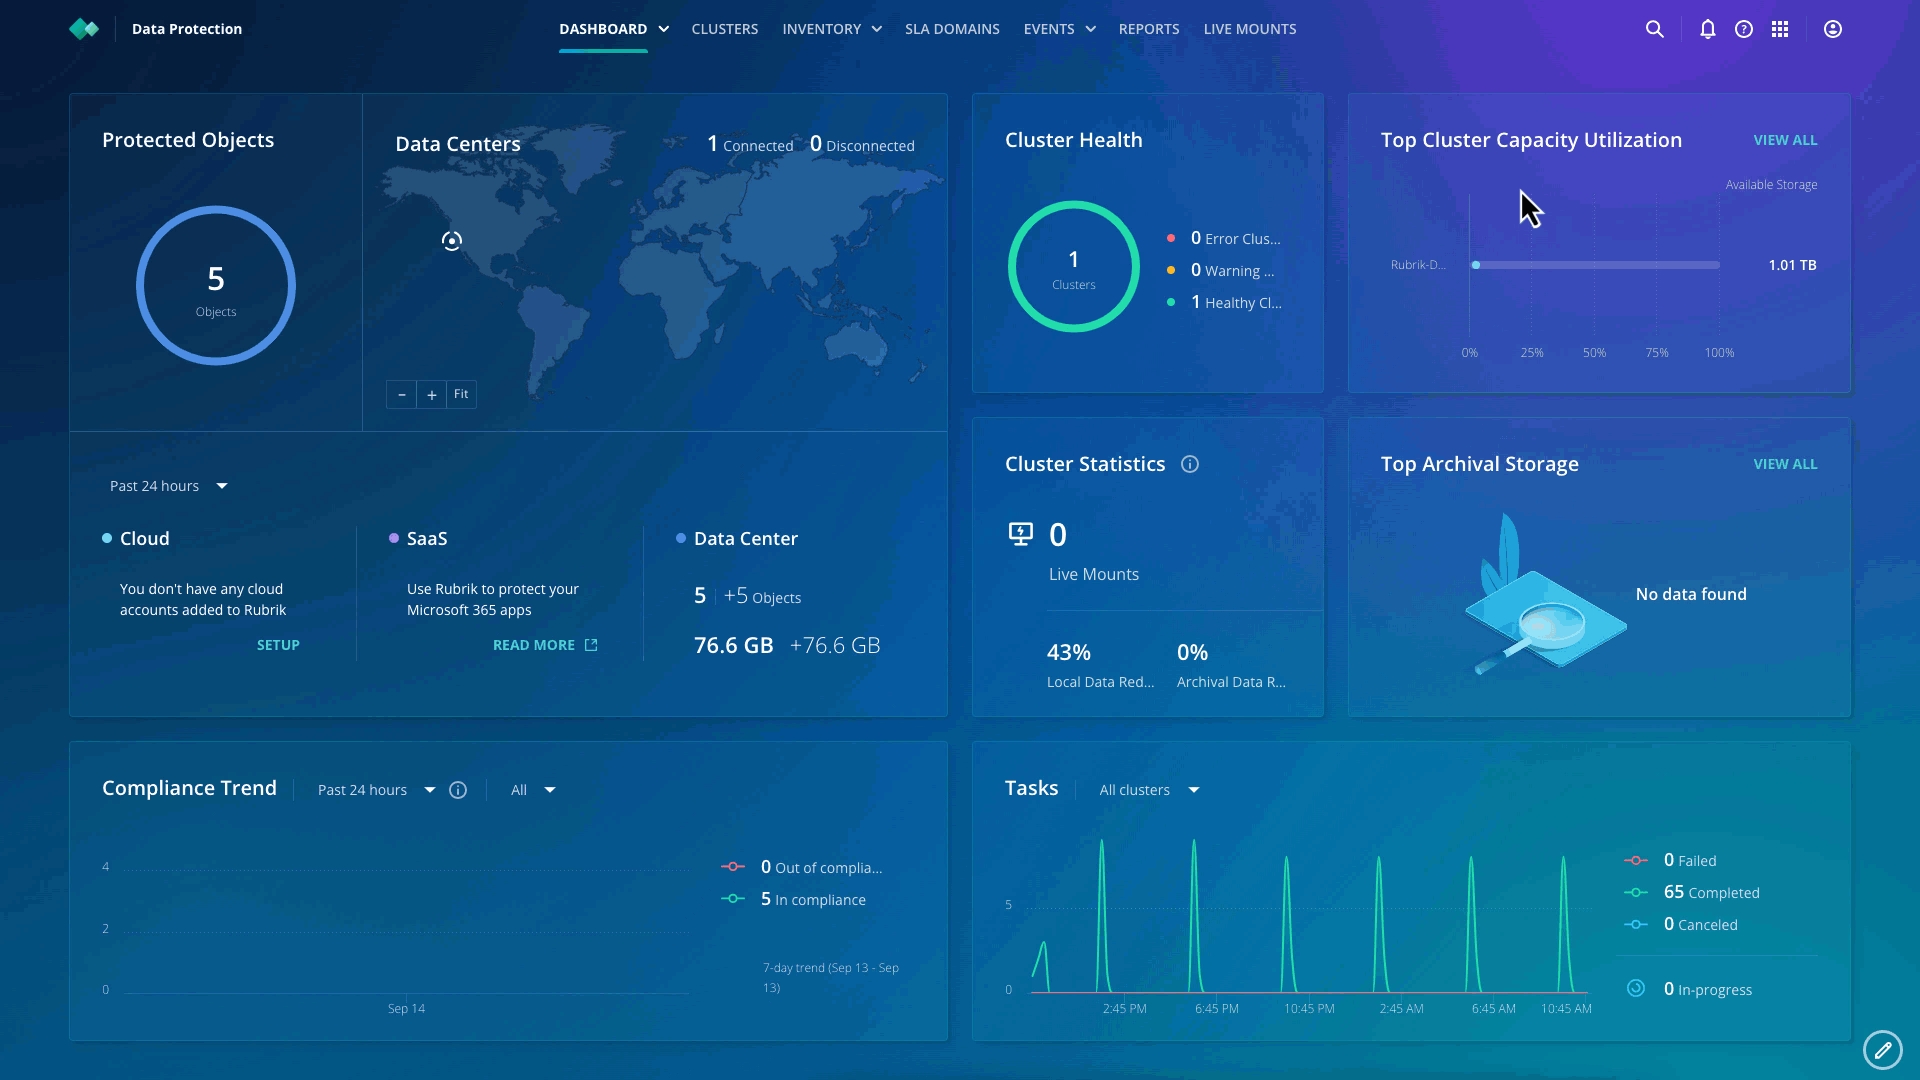
Rubrik Data Protection (RDP) delivers centralized management for your global, distributed Rubrik environment. Designed for a seamless user experience, RDP provides a comprehensive view of customers' physical, virtual, and cloud topologies while making management tasks elegantly simple and intuitive. Search for a point-in-time activity by application or location. Determine SLA-compliant applications at a glance. Powered by an automated visualization engine, RDP enables filtering as you go to generate rich custom dashboards in minutes.
Rubrik allows administrators to abstract away much of the low-end fuss required to build and maintain data protection to focus on adding value at a more strategic level across the organization. Rubrik's policy engine is simple as all of the imperative details are abstracted away and handled by an ingenious, scale-out system. The customer input fields are reduced to RPO, retention period, archive target, and replication target for specifying SLAs for protected objects.
To finish the migration process, let's look at the inventory to ensure you know all the VMs that need to be backed up. Let's start with the inventory.
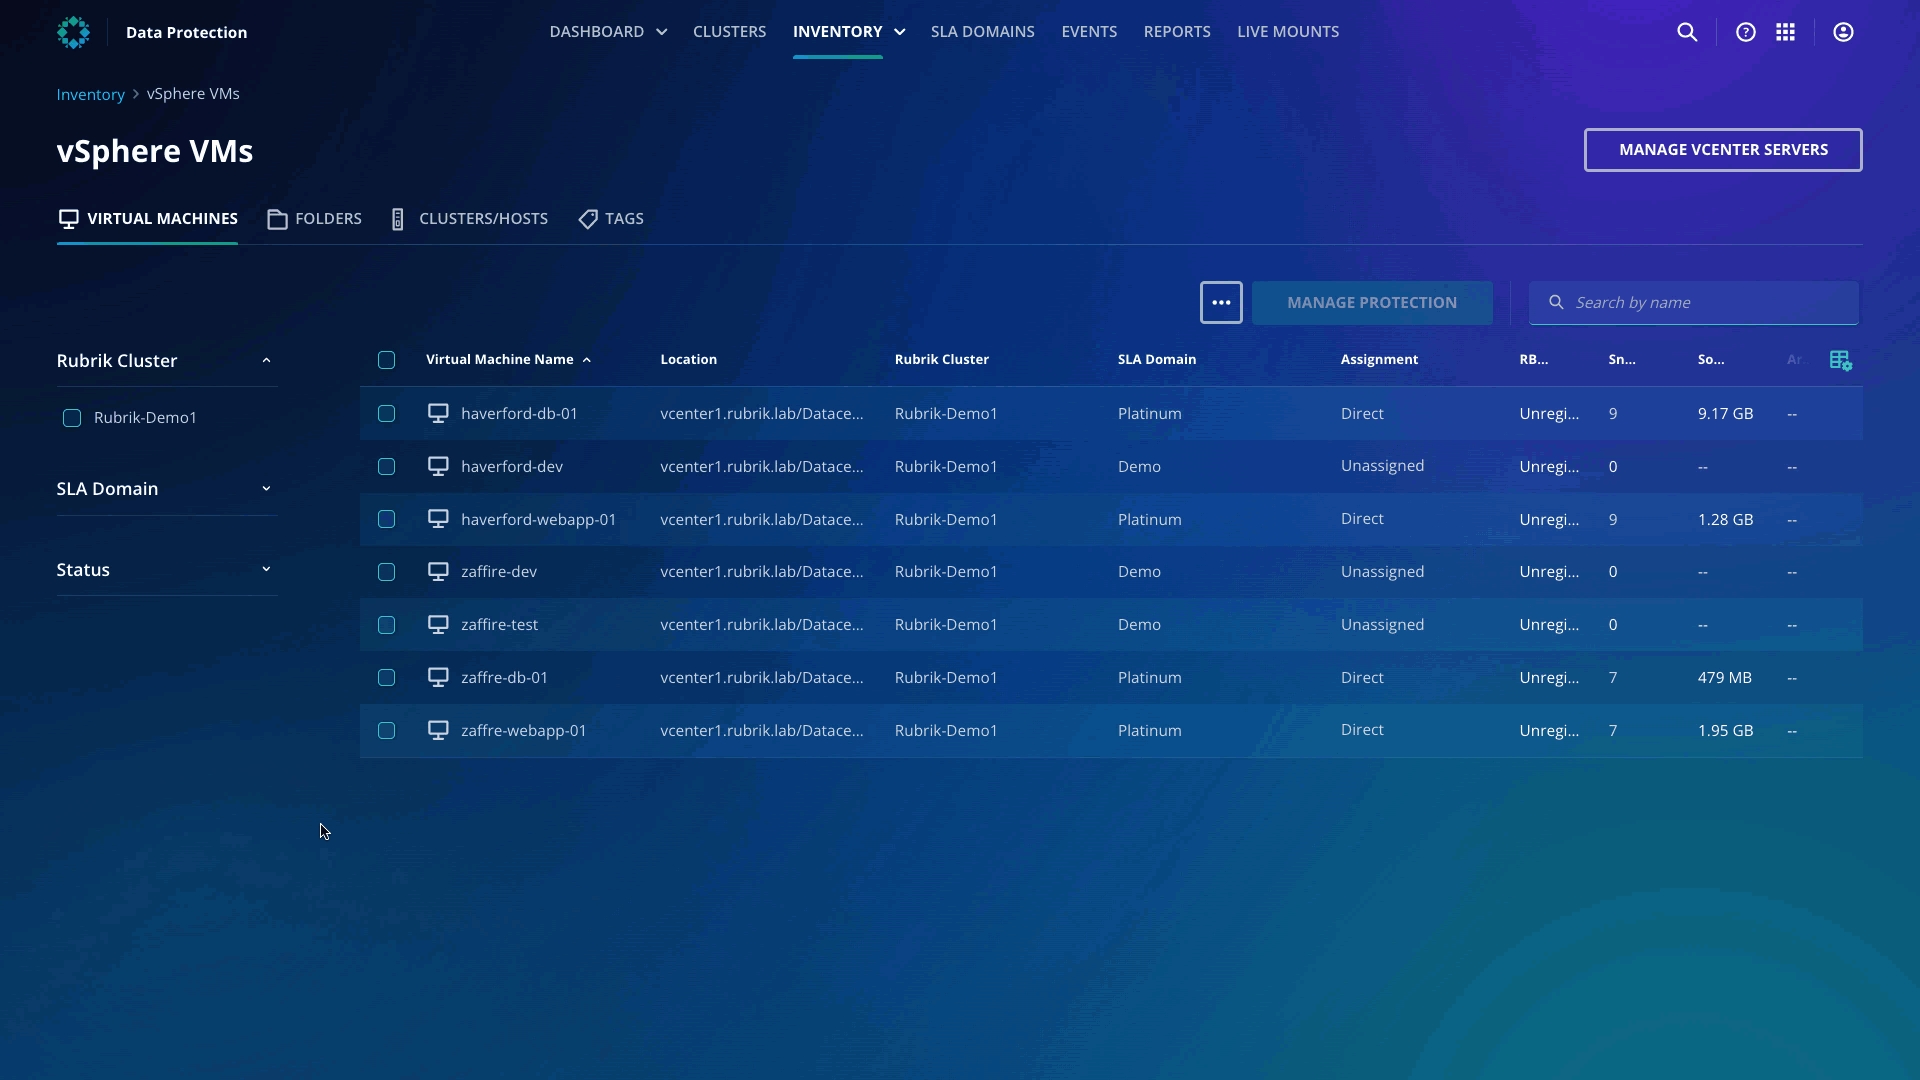
Click Inventory from the top ribbon and then vSphere VMs.
You can see all the VMs that are protected and unprotected VMs.
For now, you can focus on the unprotected VMs: haverford-dev, zaffire-dev, and zaffire-test.
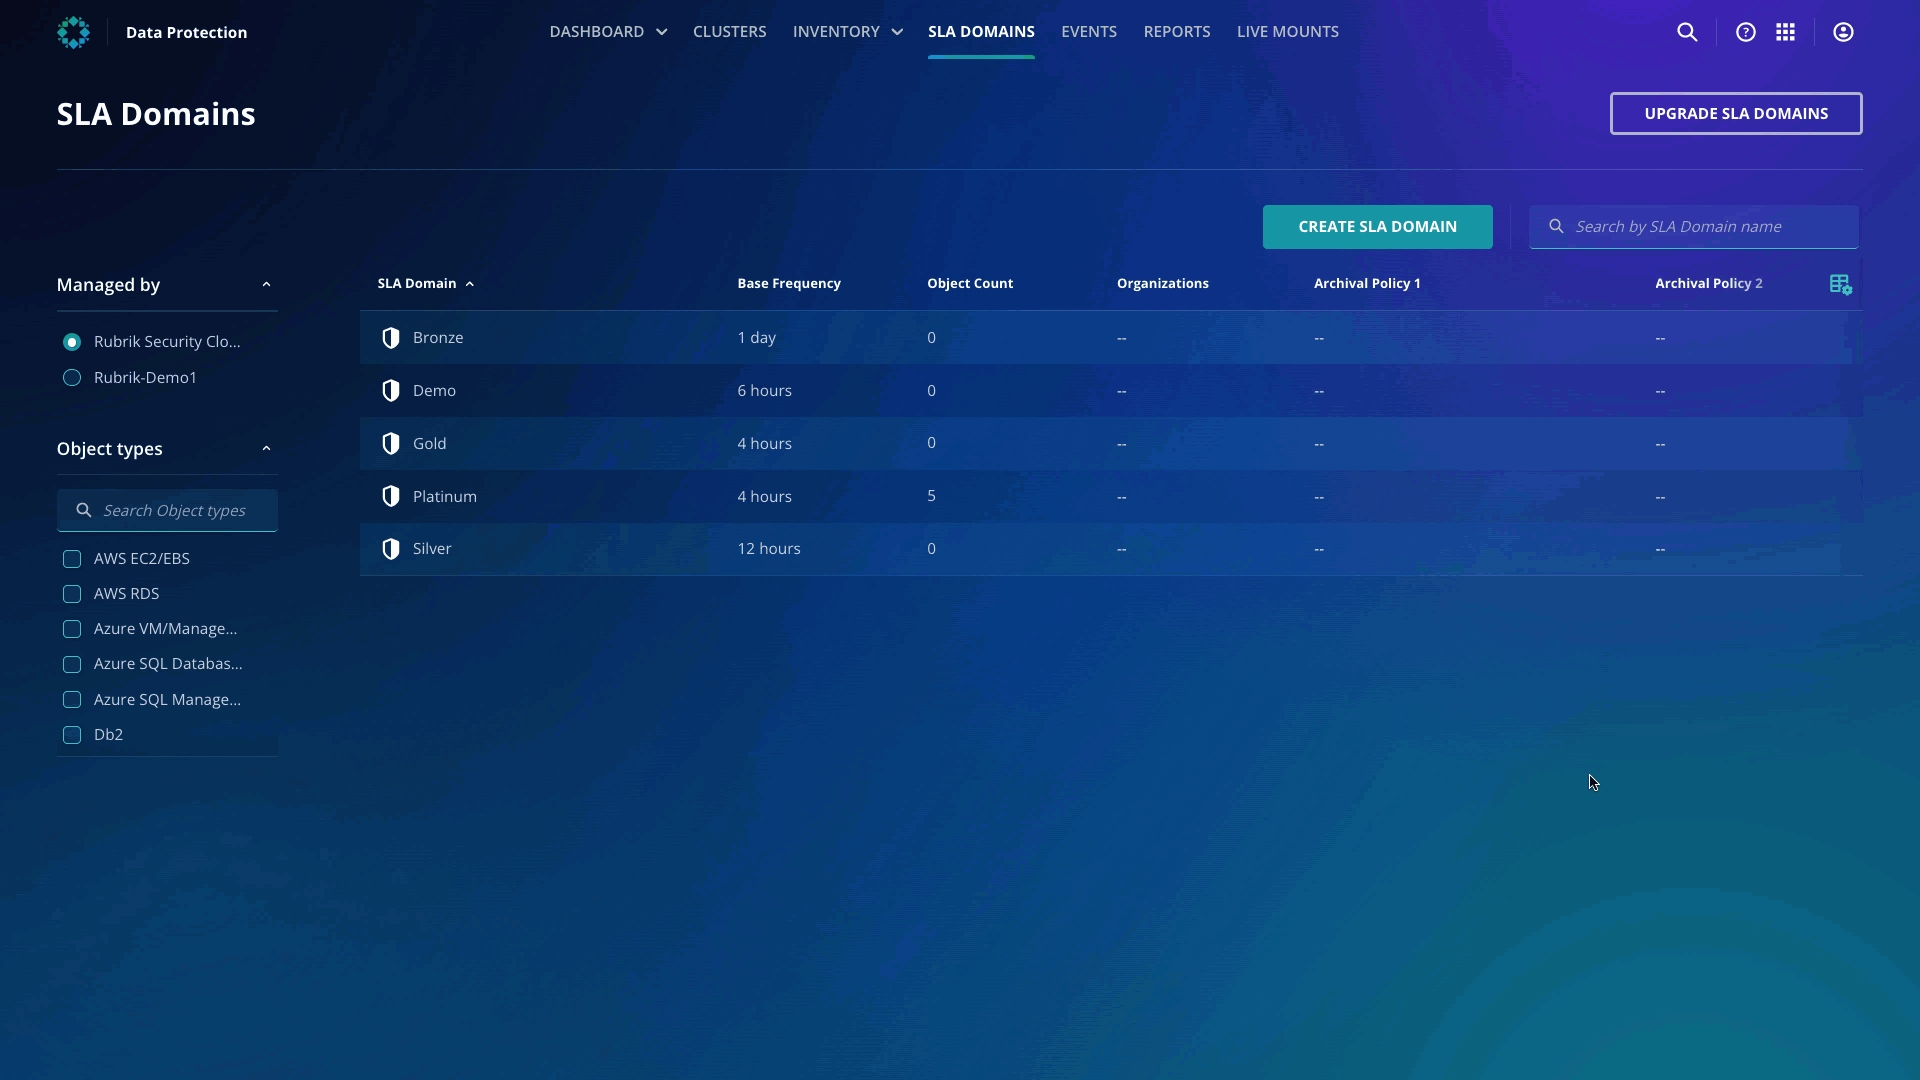
By default, there are FOUR SLA domains with RSC: Bronze, Silver, Gold, and Platinum. To protect the VMs, create an SLA domain.
Click SLA Domains from the top ribbon and then CREATE SLA DOMAIN.
Click CREATE, select vSphere VM, and click NEXT.
Specify Every 6 hours as the frequency, and retain snapshots for 7 day.
Keep everything else as default, specify Demo as the SLA Domain name, and click CREATE.
Close all the pop-ups.
Now that you have created the SLA Domain, it's time to assign for you to assign it to the unprotected VMs and ensure it's protected.
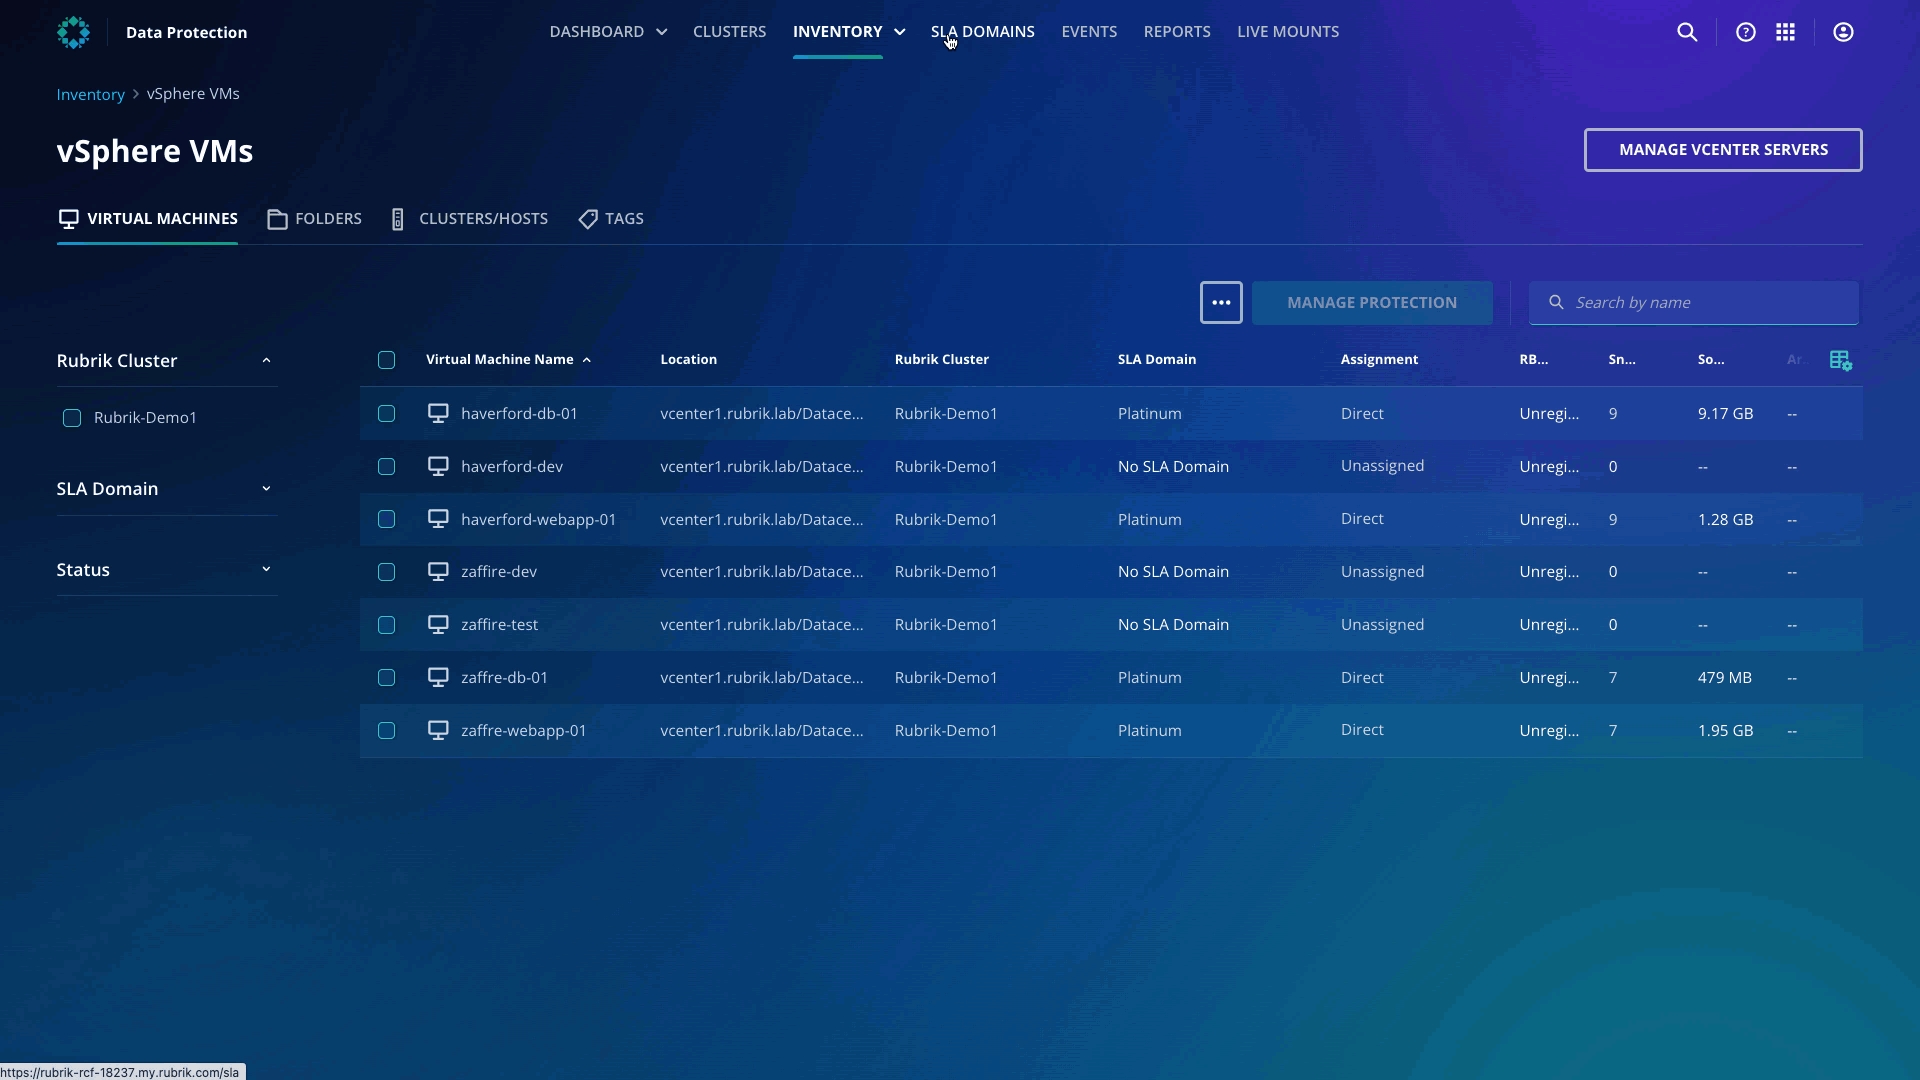
To get started, head back to Inventory and vSphere VMs.
Select haverford-dev, zaffire-dev, zaffire-test and click MANAGE PROTECTION.
Select Demo SLA domain from the list, click NEXT, and lastly, click ASSIGN.
Now you have completed the SLA Domain assignment.
As an administrator, you need to ensure that you schedule an on-demand backup.
Select haverford-dev VM from the inventory list.
From the top right, click TAKE ON DEMAND SNAPSHOT and leave the rest of the details as defaults.
Repeat the steps for zaffire-dev and zaffire-test.
Rubrik’s robust SLA policy engine ensures that data is where it needs to be when it needs to be there, enabling Rubrik to deliver rapid recovery combined with the security provided by encryption and an immutable filesystem.
Excellent job for completing the migration and protection of workloads! Let's make sure you can recover the applications quickly when needed.
In this lab, you will be playing the part of a new System Administrator at Zaffre. This is week two for you at Zaffre and your initial task is to finish the migration of the workload to Rubrik.
So without any delay, lets get started.
The next task for you is to create a new Recovery Plan through the Rubrik Security Cloud in a few steps to ensure automated recovery of the ZFG applications in case of disaster or ransomware.
If you haven't already connected to the Rubrik Security Cloud, please refer to the Lab Environment page for more details.
Once you're logged in, click the app-tray icon in the top right of the user interface, then select Orchestrated Recovery.
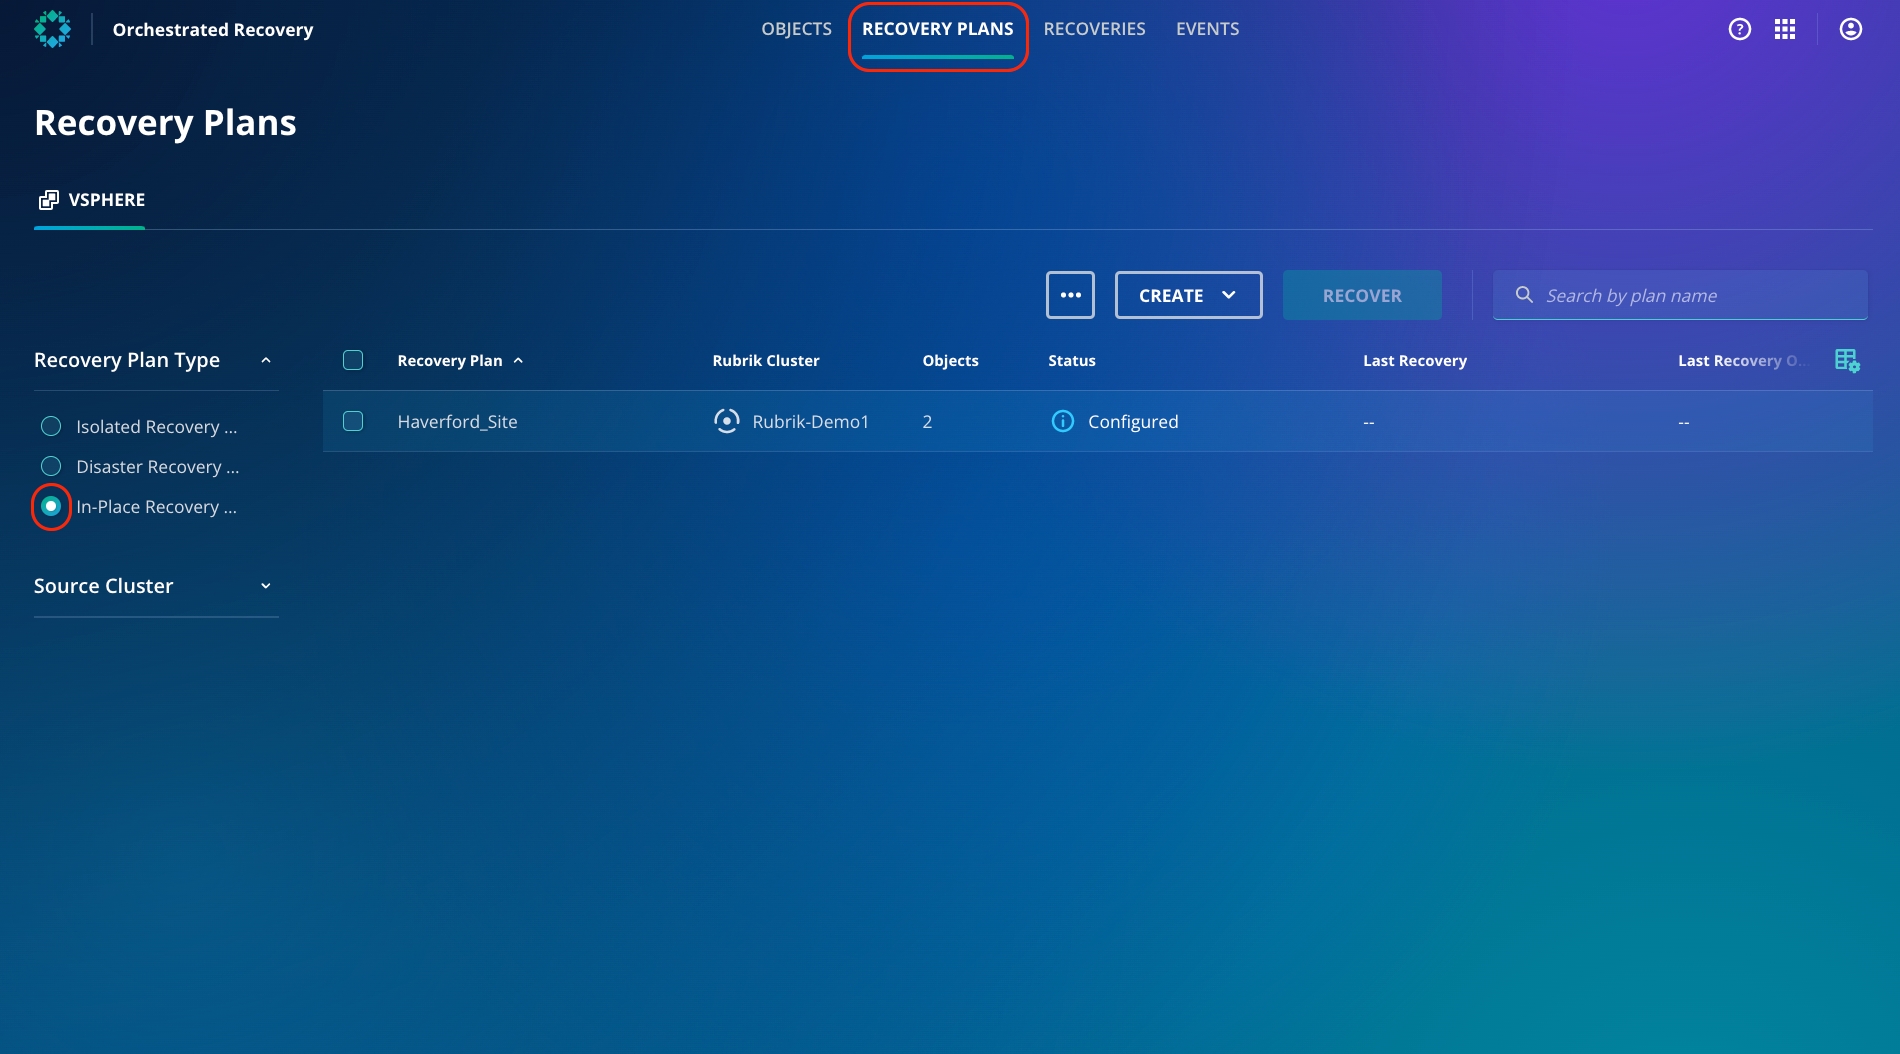
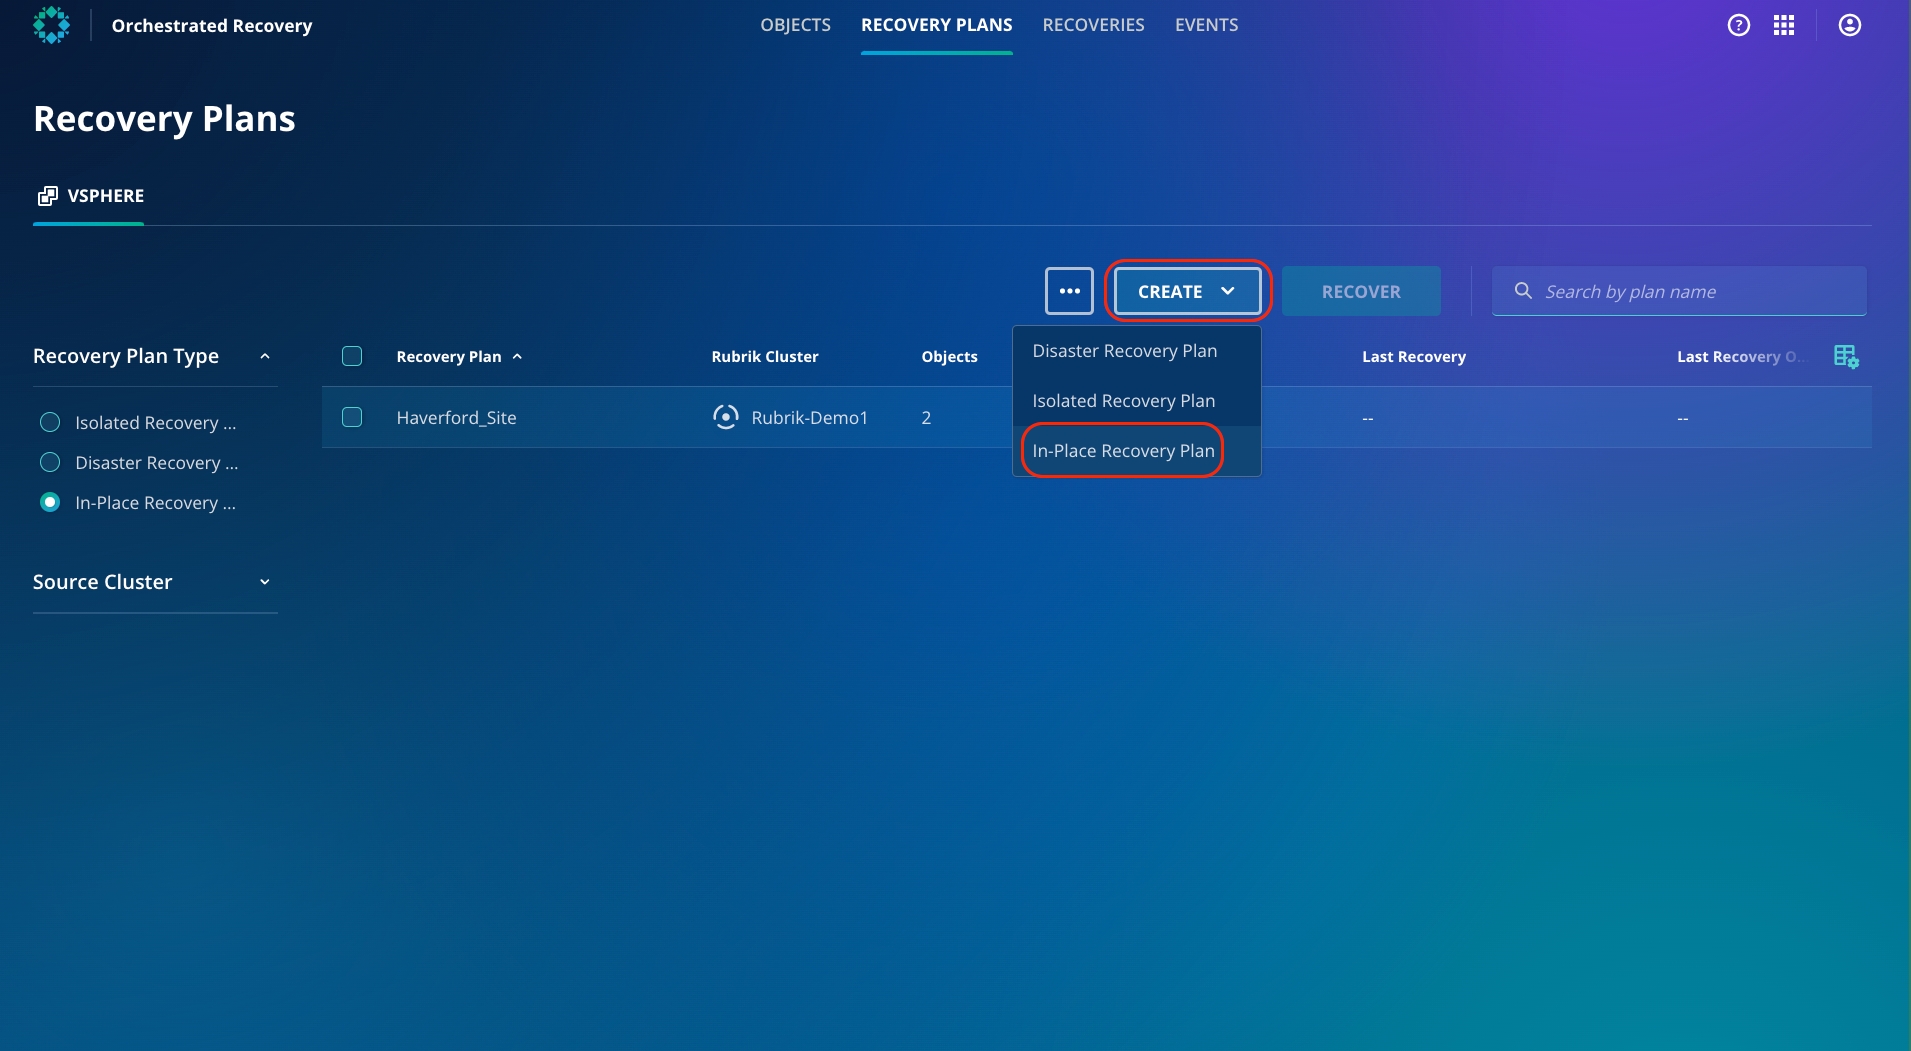
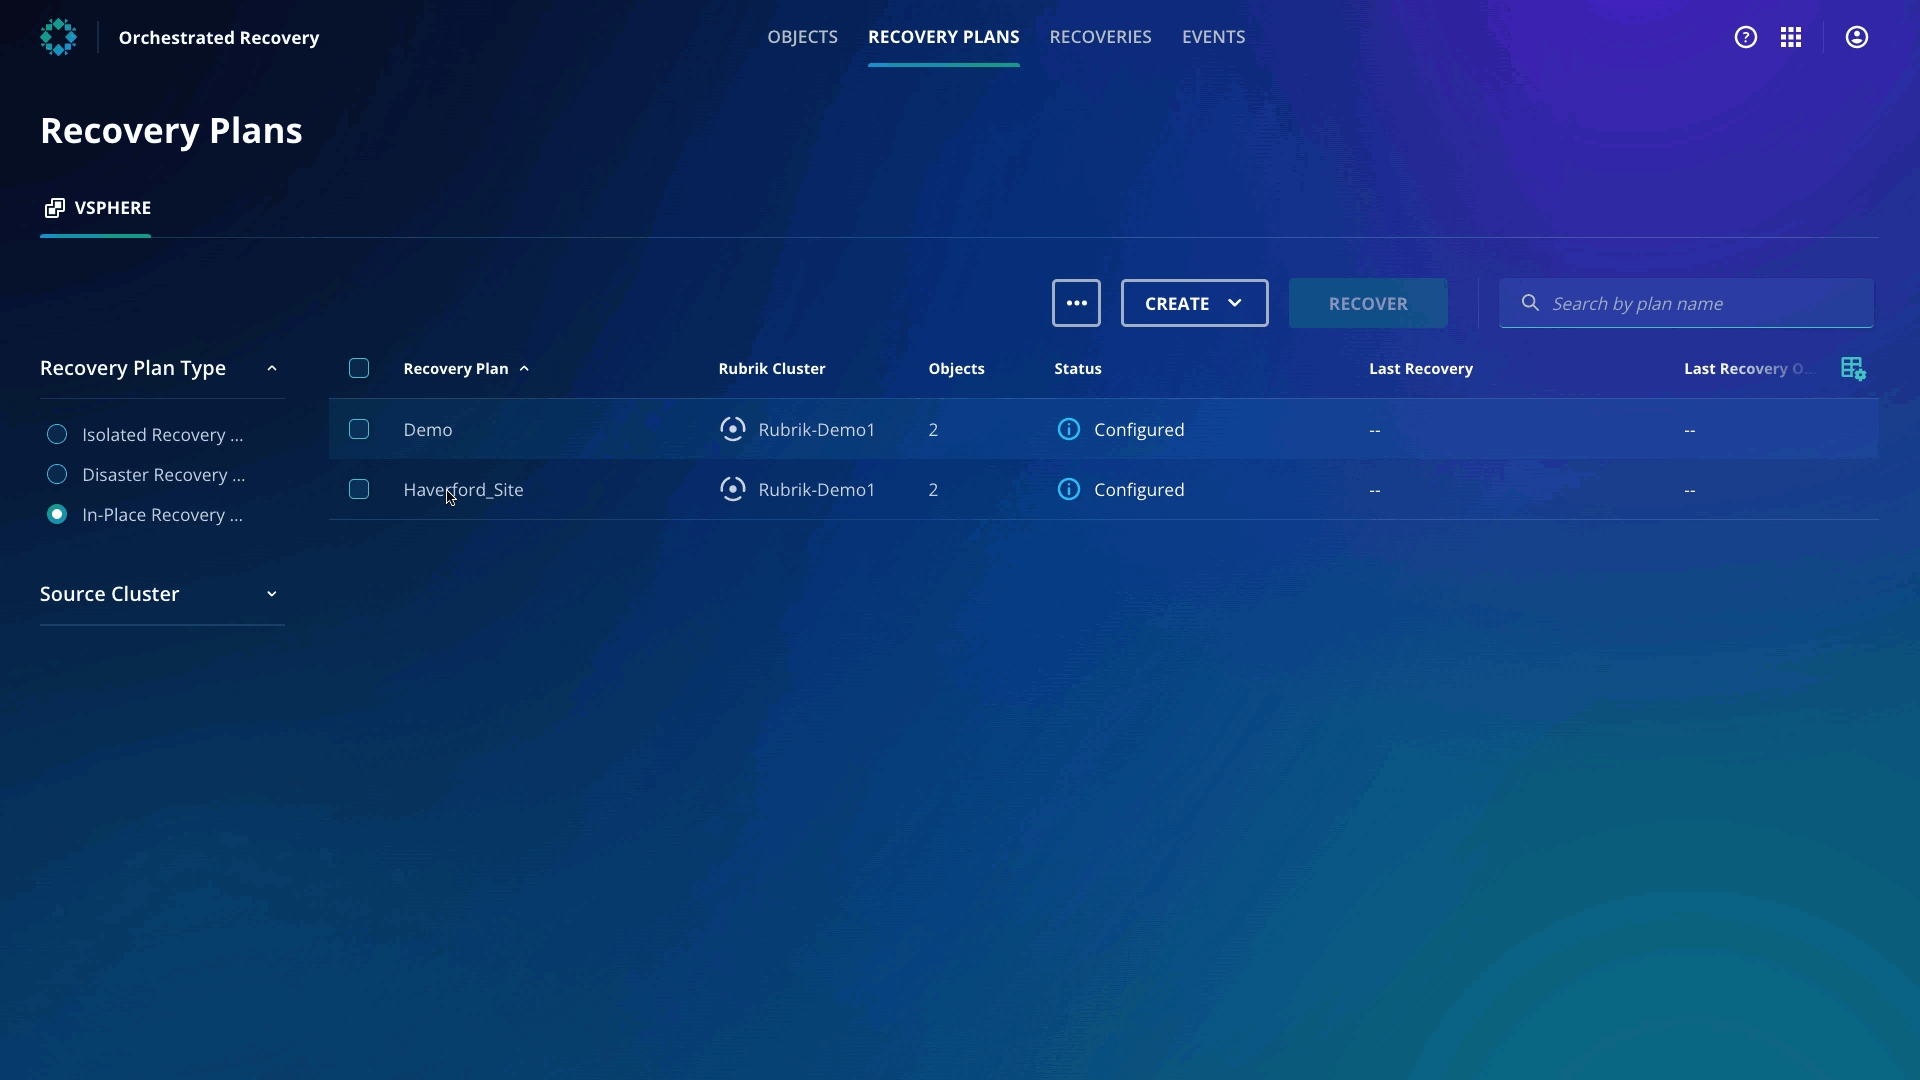
Click the Recovery Plans tab. From the left panel, select the In-Place Recovery radio button.
Click the In-Place Recovery Plan from the Create dropdown menu.
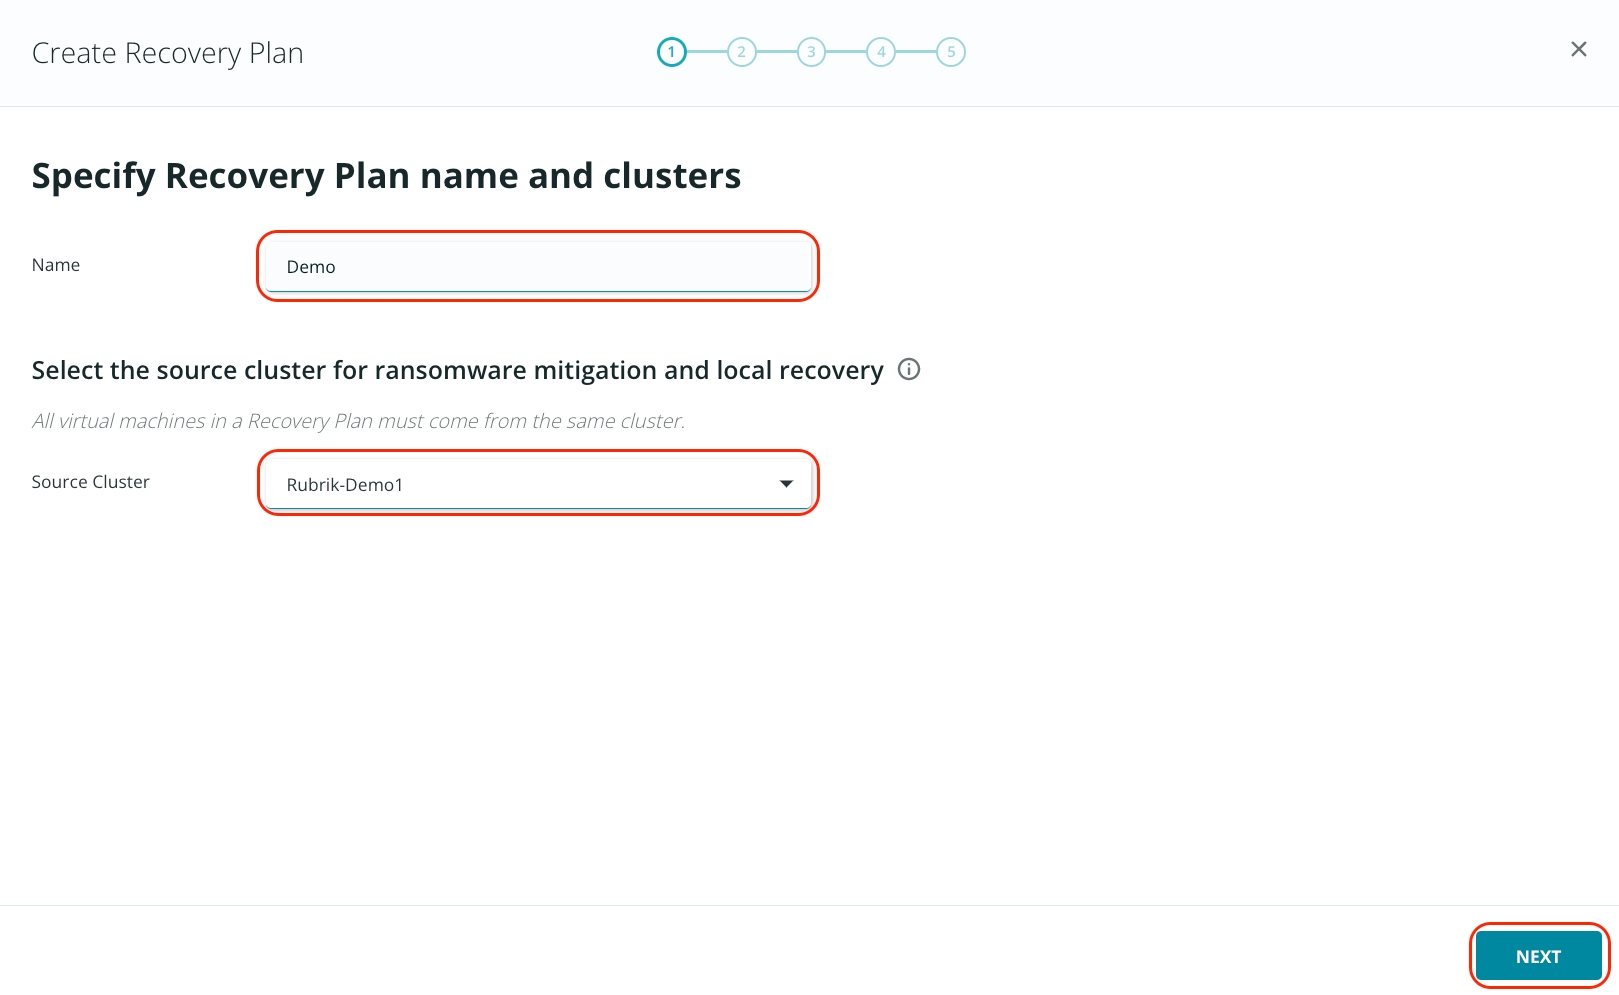
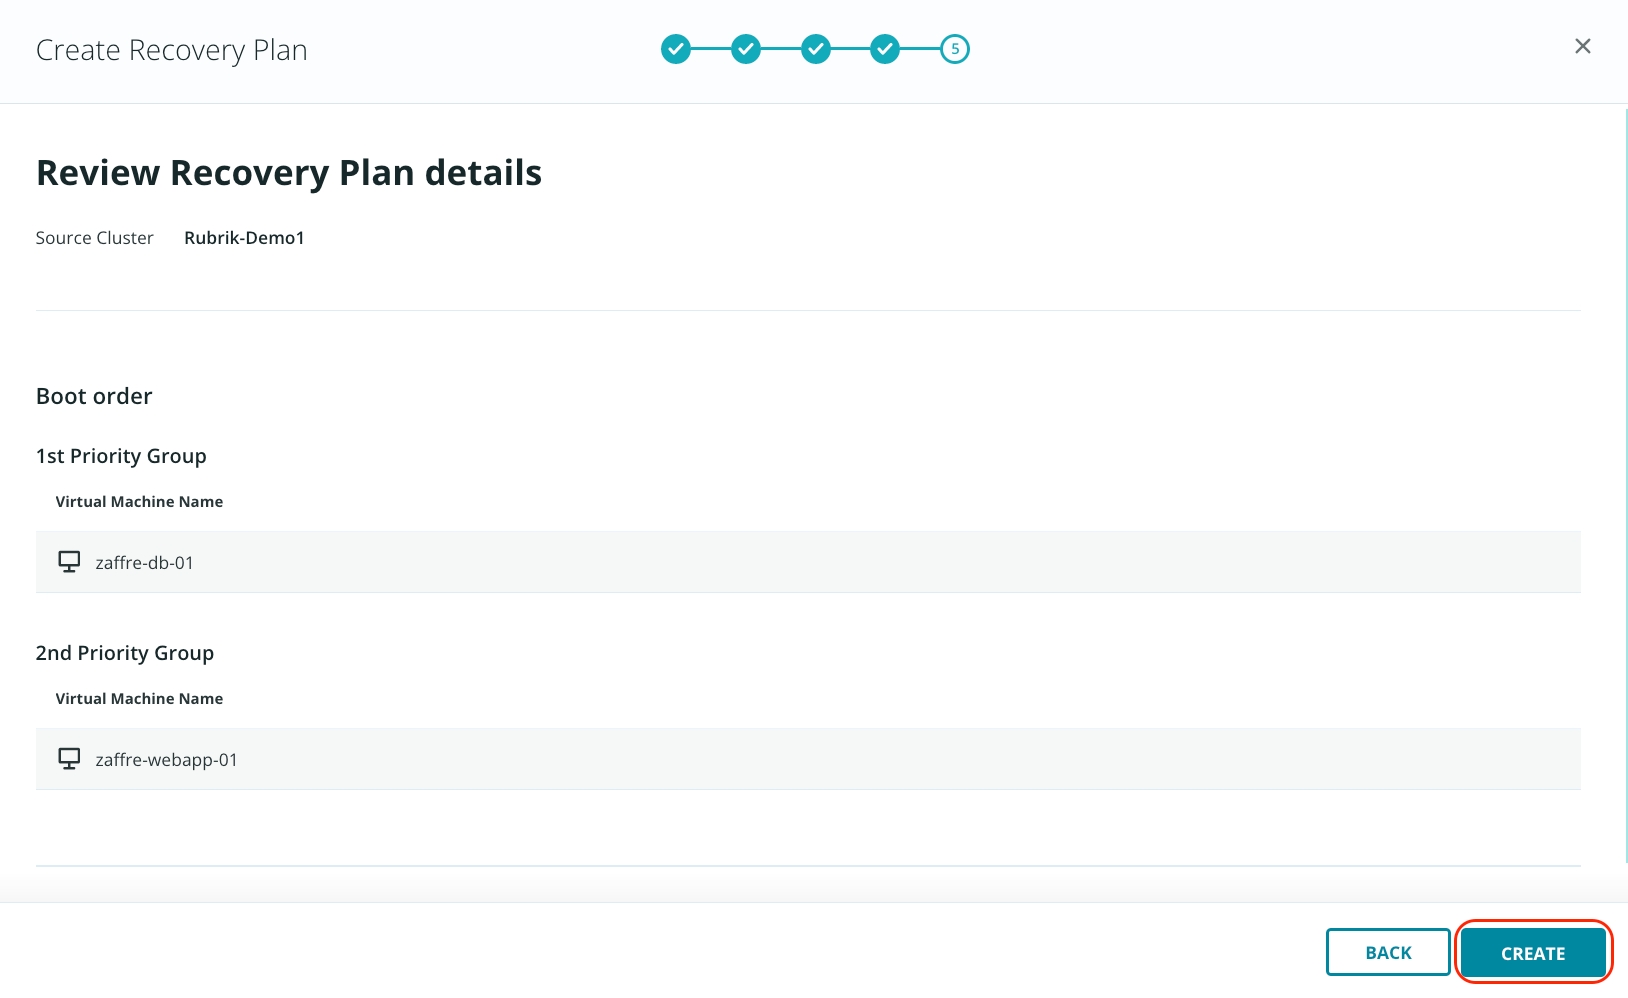
You will be taken into the wizard as shown below. Specify the Name as Demo and select the Rubrik-Demo1 as Source Cluster and click Next.
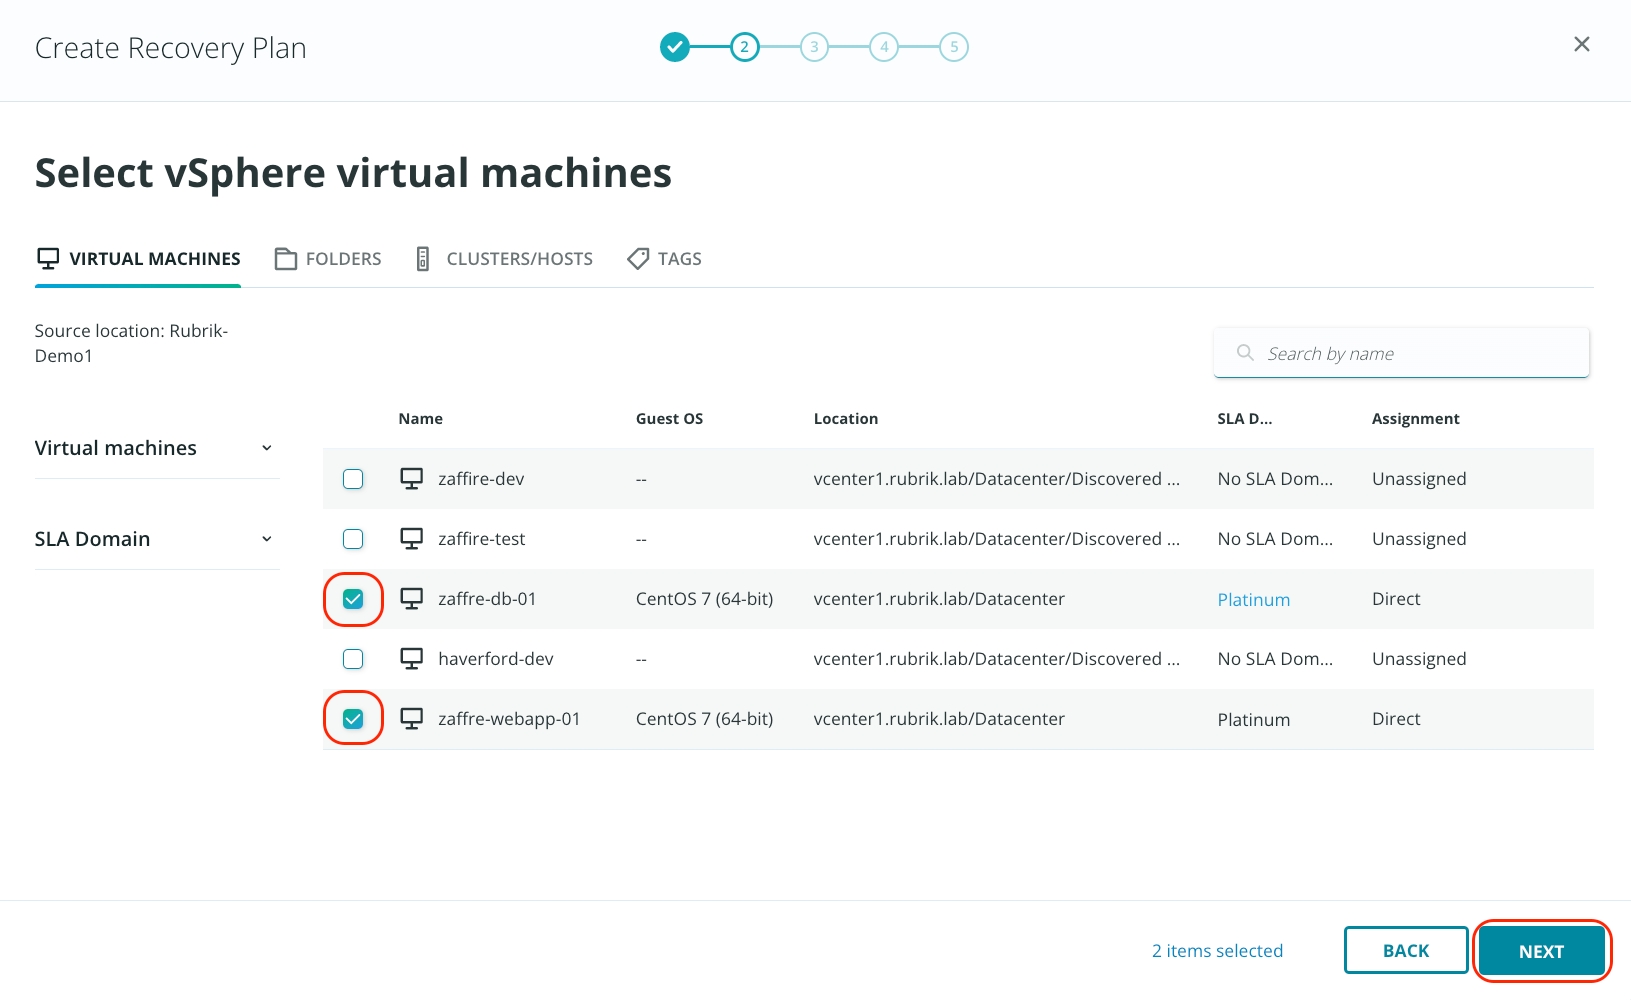
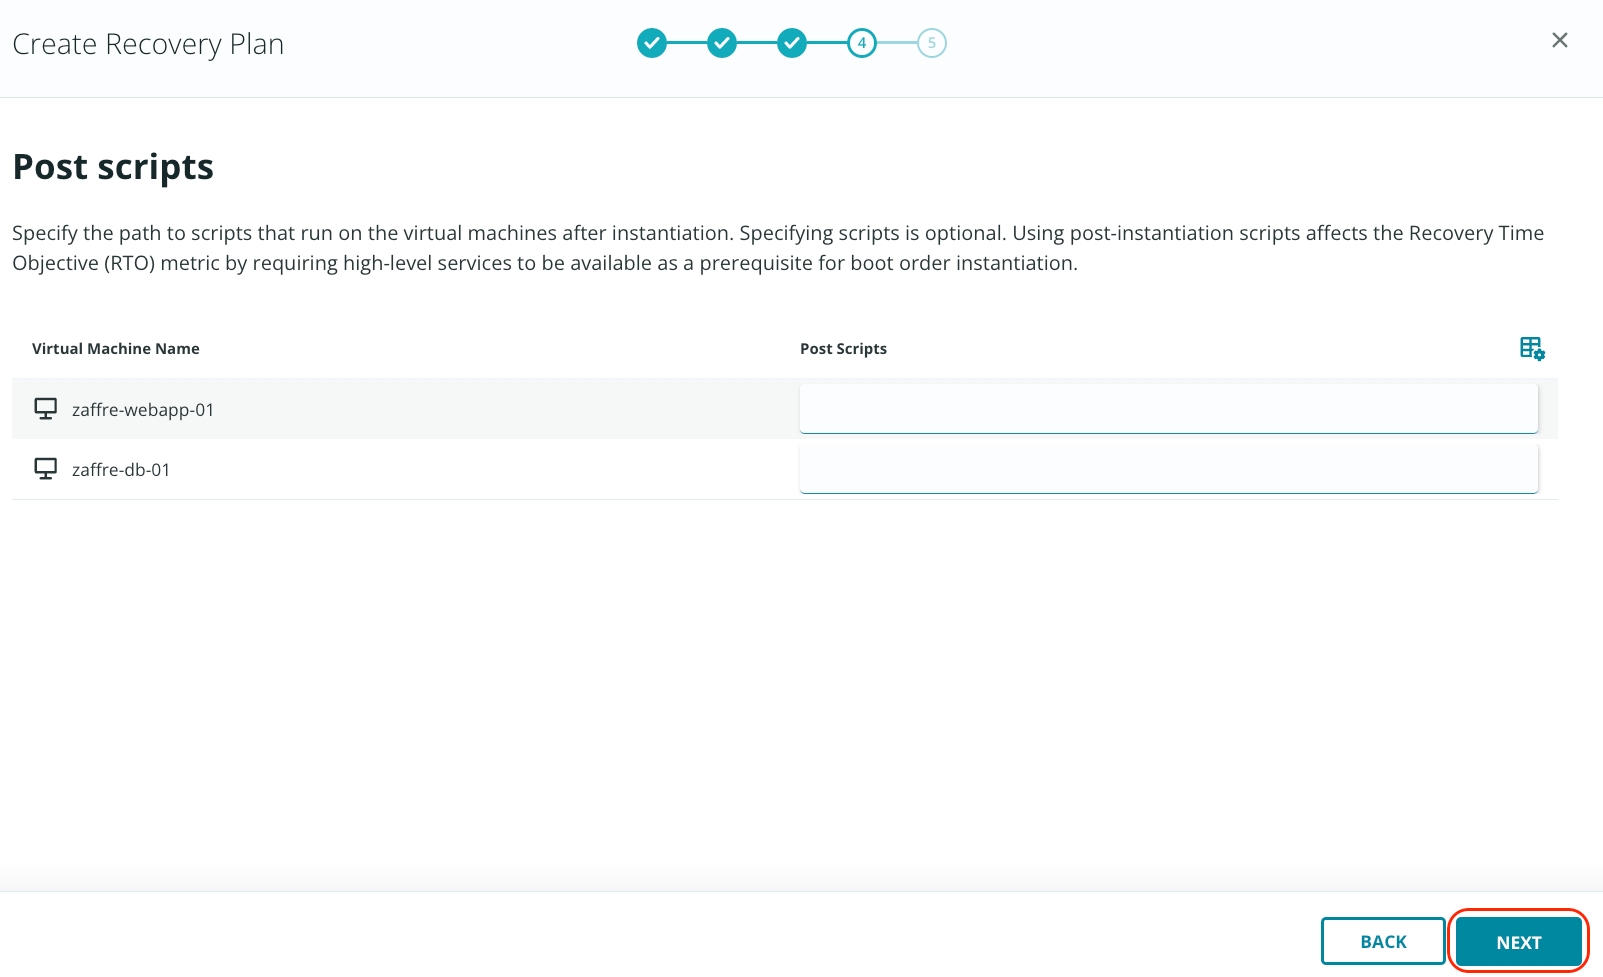
Select zaffre-webapp-01 and zaffre-db-01, then click Next.
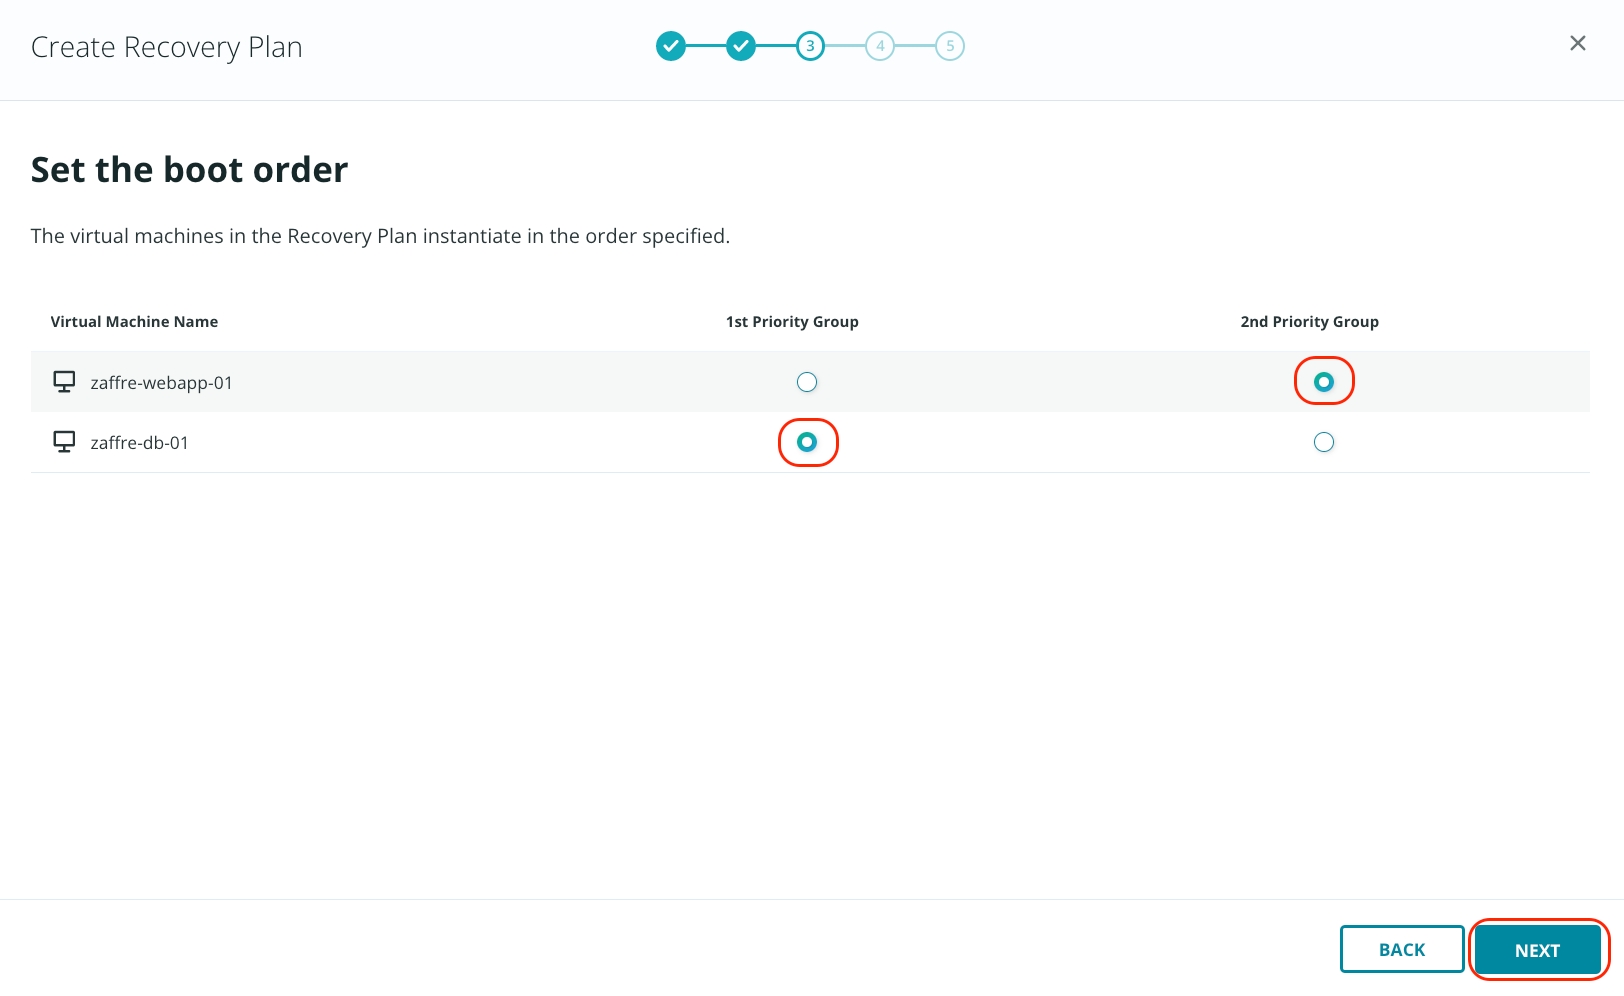
Select the priority group for the boot order of the virtual machine and click Next.
You can add the path to scripts to run on the virtual machine after failover. This is optional. For now, click Next.
Review the details and click Create.
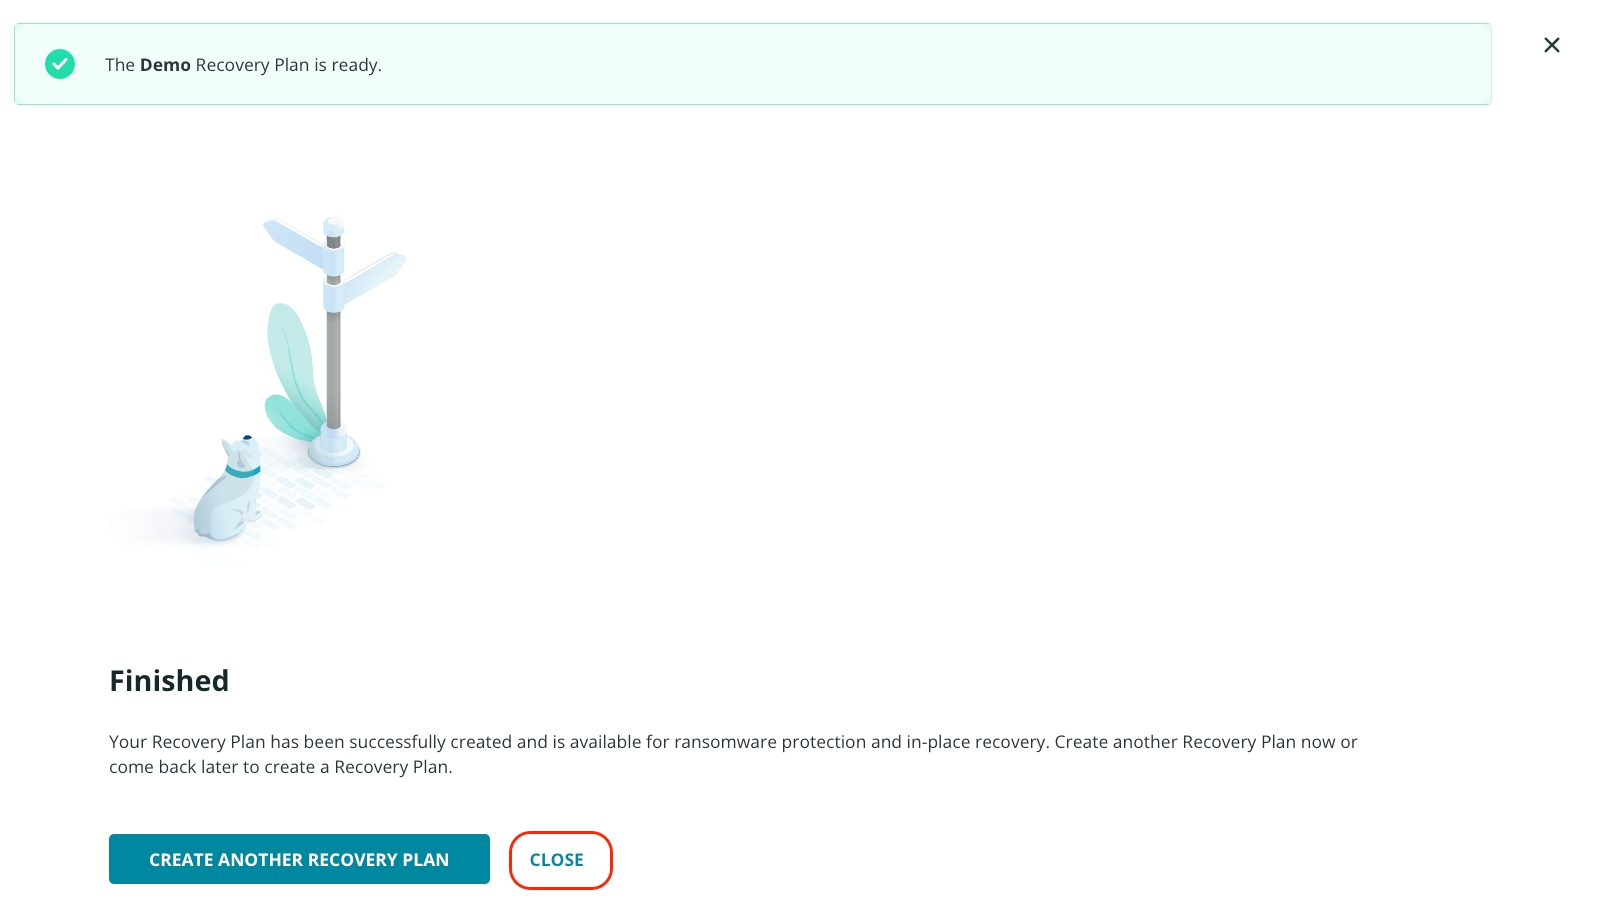
Click Close after the Recovery Plans is created.
Explore the different tabs for the Recovery Plan. After reviewing the details, click on Recovery Plans on the top left to see the list of all the Recovery Plans.
CAUTION: A VM may only be a member of one Recovery Plan at any given time. This is by design as failover or in-place recovery actions may be executed against more than one Recovery Plan at a time. In later releases of Orchestrated Application Recovery, it is planned to allow more coordinated orchestration across multiple Recovery Plans at once to ensure applications may be failed over or locally recovered in a specific order to better accommodate any interdependencies they may have with one another. Once a VM is added to a Recovery Plan, it will no longer show up as an available selection during subsequent Recovery Plan creation actions.
Recovery Plans can be scaled to 100s of VMs to enable fast VM recovery across sites or in place. Post recovery scripts can be added to automate the VM and application changes.